
Data import & export — the friendly Excel export with its inventory tabs, exporting every document from the tenant, the migration-import workflow with validation and error-report round-trip, the Requestors/Risks/Vendors directory tabs, and document migration via the migration-staging container.
Last updated: September 03, 2026 by Steve
Data Import & Export
Settings → Data import & export is where AccessPoint backs up its own no-lock-in promise: a business-readable export of your caseload on demand, and a guided path to bring historical cases in from another system without an ETL engagement.
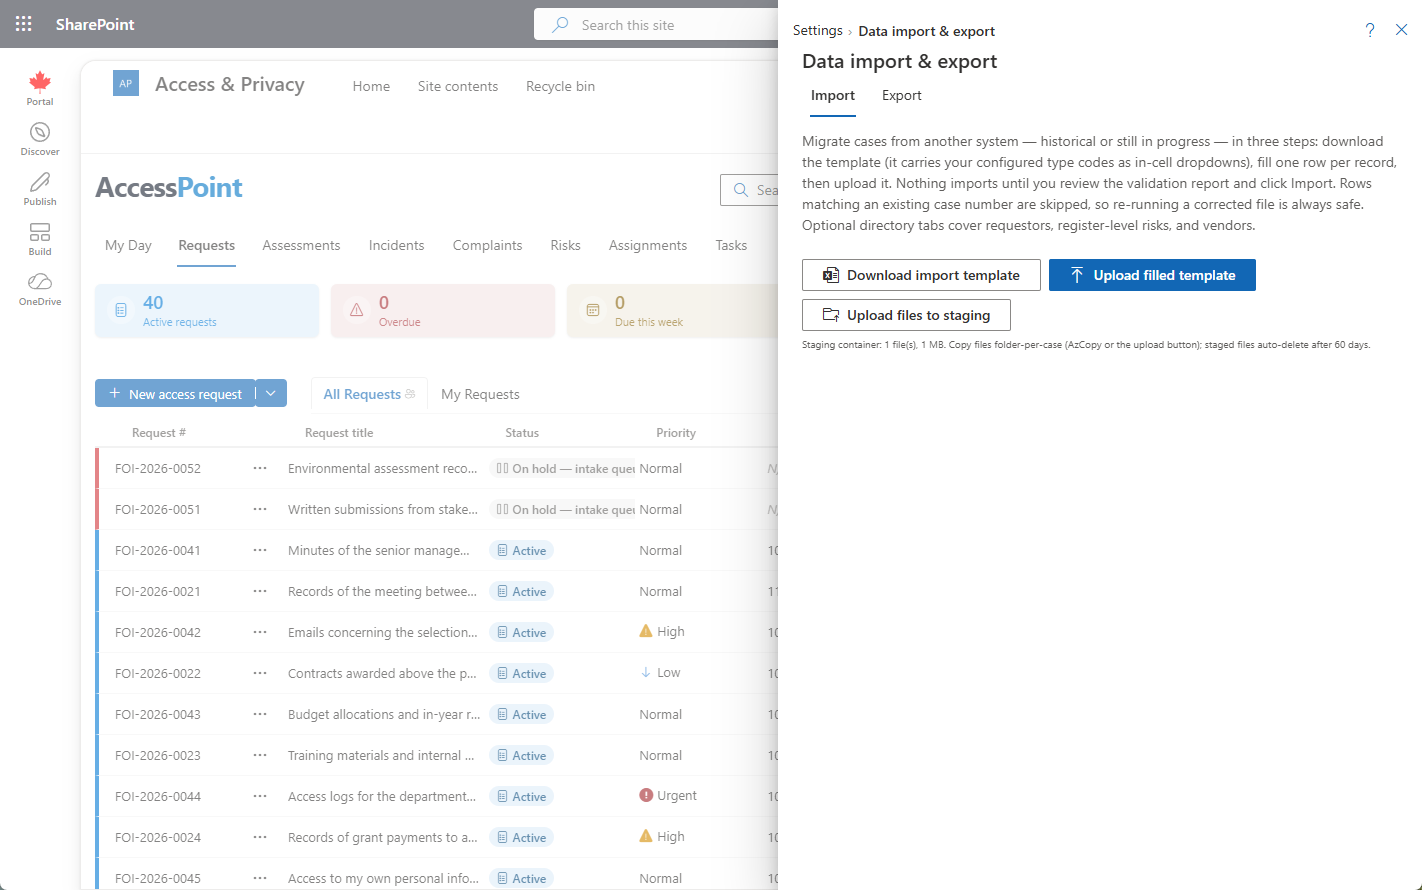
Where to Find It
Open Settings from the app toolbar and choose Data import & export in the Getting started group.
Your Data Is Never Locked In
Three things are true regardless of whether you ever use this panel:
- You own the database. Every AccessPoint table lives in the Azure SQL database in your Azure subscription. Standard Azure SQL export, backup, and query tooling all work against it — no vendor involvement required.
- Documents live in your own Blob Storage. Case documents, response packages, and case-audit exports are ordinary files in your own Azure Storage account.
- Export is one click away. The Export tab, below, produces a business-readable copy any time you want one.
Friendly Export
The Export tab produces a business-readable Excel workbook covering your requests, assessments, incidents, and complaints, plus the requestor directory, the register-level risk register, and the vendor register. Its tabs deliberately mirror the import template described below — so an export taken from one tenant validates cleanly as an import into another, which makes it useful for consolidating tenants or rehearsing a migration against a test tenant. (Statutory annual/quarterly report artifacts — the Excel/XML filings a jurisdiction pack ships a template for — come from the Reports area, not this panel.)
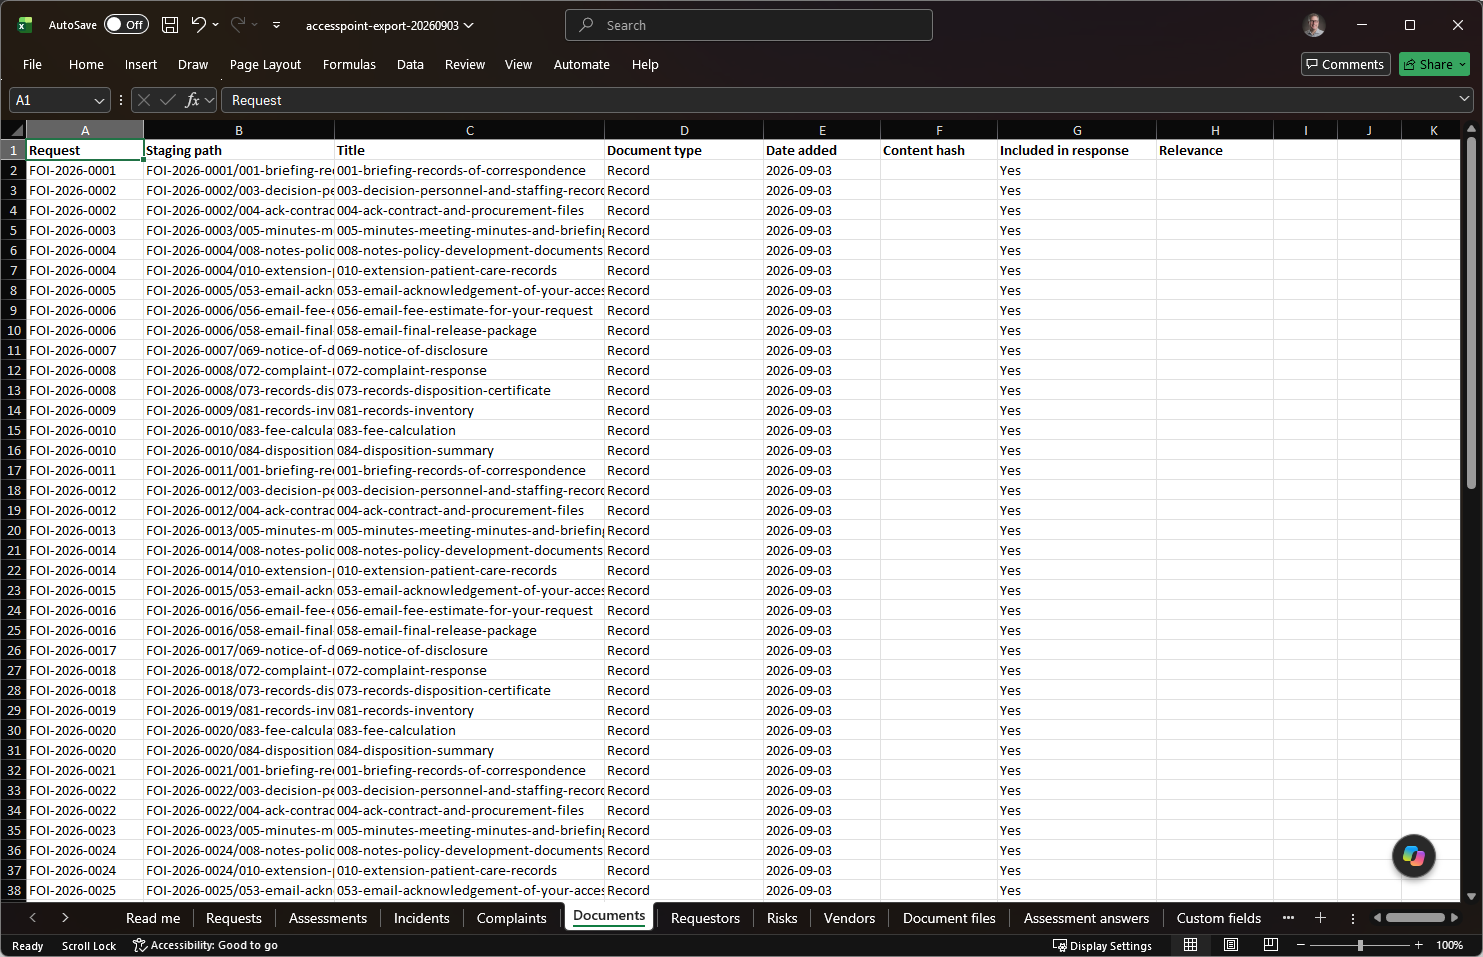
Inventory tabs. Nine read-only inventory tabs travel with the workbook; the import ignores them by name. A Read me first tab explains the storage layout and how to read the rest. Document files lists every document on every case with its metadata — case type and number, folder, size, MIME type, SHA-256, tags, source, uploader, dates, conversion status, inclusion and release decision, media kind and duration, malware-scan status — and the exact blob path of the original, the converted PDF, and any renditions, plus a suggested local path. Assessment answers carries every questionnaire and screener answer with the template's prompt; Custom fields the tenant-defined field values on each case, resolved to labels; Redactions every redaction on every document — location, status, the exemption cited and any alternates, and for a recording the effect and time span (never the withheld text itself); Extensions, Consultations, Correspondence, and Reviews the corresponding records on every case, one row per item or review step. The workbook is metadata — the files themselves stay in your storage account, and the procedure below pairs the two.
Exporting Every Document from the Tenant
The workbook gives you the metadata; this procedure gives you the bytes. Run it before decommissioning, for an offline archive, for an audit, or to hand a caseload to another system.
Documents live in the documents container of the storage account the template created, grouped by case GUID, not by case number: request records at {tenantId}/{requestId}/{documentId}{ext}, assessment records under {tenantId}/assessments/{assessmentId}/documents/, incident records under {tenantId}/incidents/{incidentId}/, complaint records under {tenantId}/complaints/{complaintId}/, converted PDFs as {documentId}_converted.pdf beside the original, and renditions (media proxies, posters, waveforms, transcripts, viewer copies, and released recordings) under renditions/{documentId}/. The Read me tab repeats this table with your tenant's actual values.
Prerequisites. The identity you run as needs Storage Blob Data Reader on the storage account. Storage account keys are disabled and must stay disabled — use Entra sign-in, never a key. You need the Azure CLI signed in and, for speed and resumability, AzCopy 10 (
azcopy login).Download the container, preserving the folder structure:
azcopy copy "https://<storage-account>.blob.core.windows.net/documents/*" "D:\accesspoint-export\documents" --recursive=true --check-md5=FailIfDifferent
# or, for a small tenant:
az storage blob download-batch --auth-mode login --account-name <storage-account> --source documents --destination "D:\accesspoint-export\documents"
To download one case only, use its Case id from the workbook as the path prefix.
Verify against the workbook. Count the rows on Document files against the files on disk and spot-check the SHA-256 column with
Get-FileHash.Rename into case-number folders. The download is keyed by GUID; the workbook's Suggested local path column (
{case number}/{folder path}/{document name}{ext}) rebuilds it by case number, leaving the GUID tree untouched as the audit copy.
Converted PDFs and everything under renditions/ except Release renditions are derived from the original and regenerate on demand, so you can skip them for an originals-only copy. Keep the Release renditions: they are the burned recordings actually disclosed, and no original reproduces them. Response packages are separate artifacts under each case's Export history. The Azure SQL database remains the authoritative copy of everything (a bacpac export captures it whole), and the audit ledger exports from Settings → Audit ledger. Nothing in this procedure changes the tenant.
Migrating Historical Data
The Import tab migrates a historical caseload from another system, end to end, without a developer or an ETL tool:
- Download the import template. It's generated for your tenant, so its Reference tab and in-cell dropdowns already carry your configured type codes and stage values.
- Fill in one row per record, dates as
YYYY-MM-DD. - Upload and read the validation report.
- Import now to run it in the background.
Legacy Reference vs. Generated Numbers
Every imported row needs an identifier, and the template gives you two ways to supply one:
- Put the old system's identifier in Legacy reference — always, on every row.
- Leave Number blank in the normal case: AccessPoint generates an
IMP-prefixed number, keeping itself the single numbering authority. - Supply a Number only when your register or a published disclosure log requires the old case number to remain the official one. A supplied number is kept verbatim — and if it matches your tenant's configured numbering format, it automatically advances the sequence so newly created cases continue cleanly after it. The validation report tells you when a sequence advance happened.
Validation and the Error-Report Round-Trip
Uploading doesn't import anything by itself — it produces a validation report, per tab, showing what would be created, what would be skipped, and any row-level errors. Imports are strictly create-only: a row matching an existing case number is skipped without touching that record's data, which is what makes re-running a corrected file always safe. Download error report hands back your own workbook with an Errors column appended, so the fix-and-reupload loop stays inside the one file.
Historical by Construction
Once Import now runs (in the background — you can close the panel), imported records are deliberately inert on arrival: no notifications are sent, no reviews spawn, and no deadlines recompute. Supplied dates are stored exactly as given, and every imported record carries an Imported audit-trail entry so the provenance is always visible later. Requestors are matched to existing contacts by email (or created if unmatched); an access-officer email with no match falls back to the importing administrator.
The Directory Tabs
Three further tabs migrate the registers that sit around your cases, using the same create-only skip semantics:
| Tab | Skip key | Notes |
|---|---|---|
| Requestors | Email (else name) | Import requestors in the same workbook as their requests, and a Requests row sharing the email links to the full imported contact instead of a bare auto-created one. Institutions are matched by name, or created once per run. |
| Risks | Title | Register-level (standalone) risks only — a risk that belongs to an assessment or incident travels with that case instead. Category codes validate against your configured risk categories; likelihood, impact, and risk level are stored as given, since a migrated historical determination is a record, not something AccessPoint recomputes. |
| Vendors | Name | The vendor/processor register — role, contact, jurisdiction, DPA facts, contract end, risk level, and status. |
Migrating Documents
Legacy case files migrate through the pre-provisioned migration-staging blob container in your own storage account, listed on the workbook's Documents tab — nothing to provision, the container ships with the deployment template.
- Stage the files, folder-per-case (
LEGACY-42/All Staff Memo.docx): AzCopy for volume (it preserves your folder tree; add--put-md5to enable hash verification), the Azure portal's drag-and-drop, or the panel's own Upload files to staging button for smaller sets. Paths are unique by construction, so identical filenames on different cases never collide. - List each file on the Documents tab — the case it belongs to (a Number or Legacy reference, or an existing request), its staging path, and optionally a title, document type, date, and an MD5 content hash. When both the manifest and the staged blob carry a hash, the importer verifies them and rejects a mismatch — an optional chain-of-custody check.
- Validate both directions. Every listed path must exist in the container, and staged files that aren't listed are surfaced as a notice rather than silently imported. After adding files to the workbook, re-validate without re-uploading it.
- Import. Each listed file is copied into the normal document store and rides the same conversion/indexing pipeline as a native upload, carrying Migration Import provenance. A file already recorded on the case is skipped on re-runs.
Staged files auto-delete after 60 days — they're sensitive records sitting outside the normal document lifecycle, so the container doesn't hold them indefinitely by default.
Related Pages
- Retention Review — how AccessPoint later manages the disposition of the cases you migrate in.
- Requestors — the contact directory the Requestors tab populates.
- Privacy Subjects — the Vendors register the Vendors tab populates.
- Audit Ledger — where the
Importedprovenance on a migrated record shows up.