Assignment detail view — custodian instructions, document collection, task management, and attestation submission
Last updated: March 29, 2026 by Steve
Assignment Details
When you open an assignment as a Custodian, you see a tabbed interface that organizes everything you need to complete your collection work.
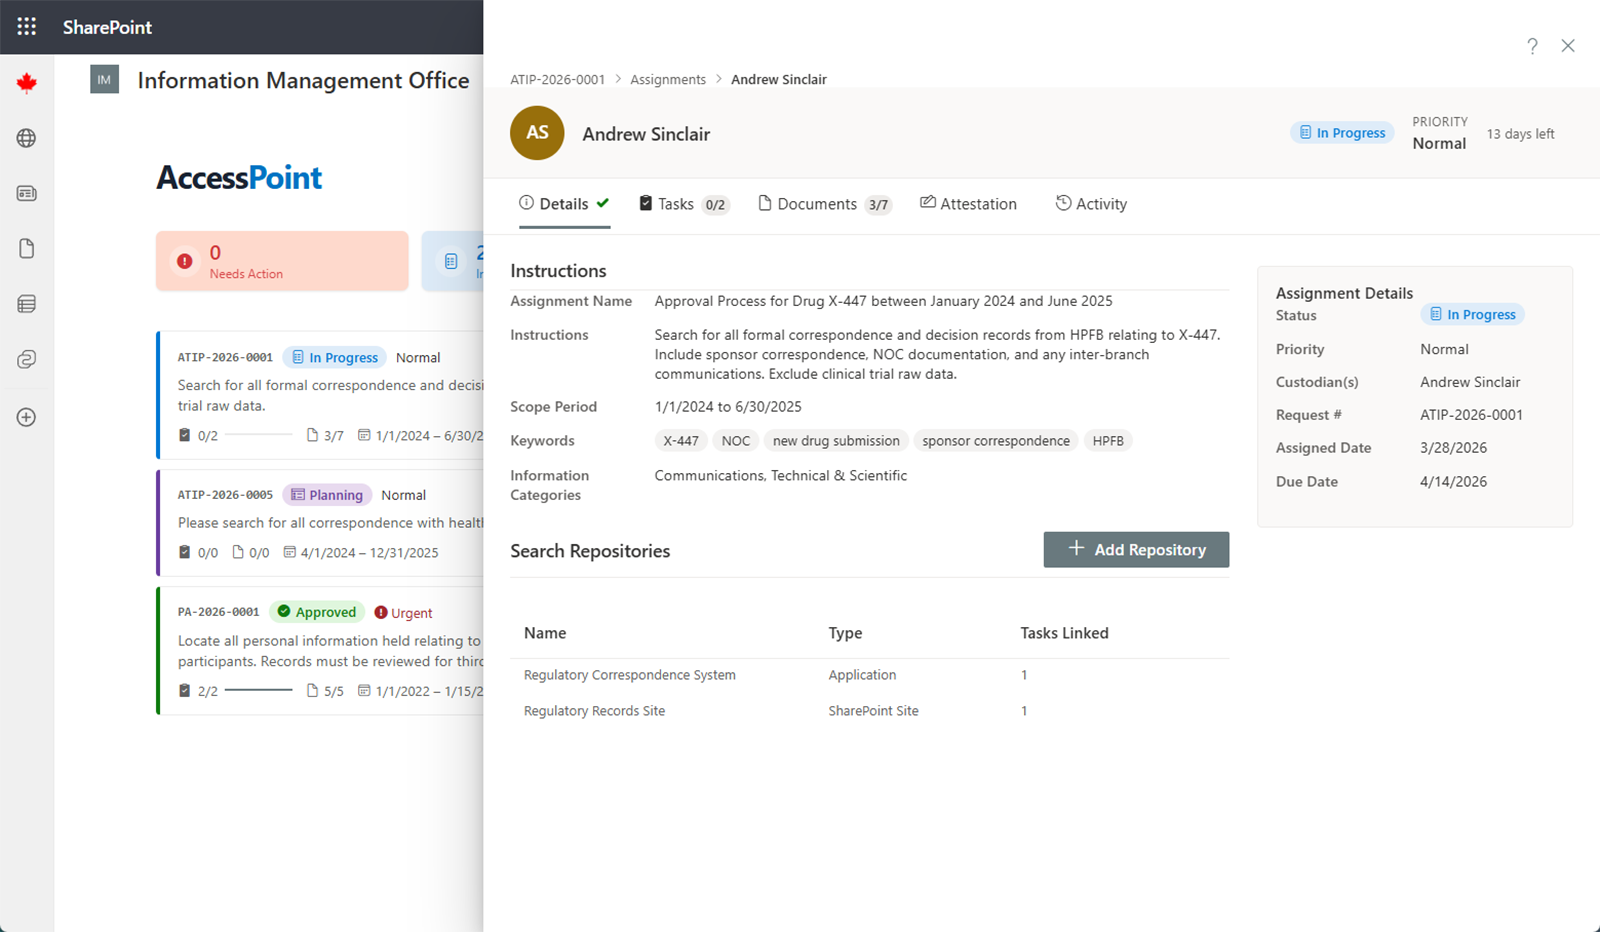
Assignment Details Tab
The first tab shows the instructions provided by the SAO:
- What to search for — keywords, subject matter, or specific records
- Date range — the time period your search should cover
- Repositories — which data sources you need to search
- Due date — when the assignment must be completed
Read these instructions carefully before beginning your search.
Repositories Tab
This tab lists the data sources you need to search. For each repository you will see:
- Name — the repository identifier
- Location — where the repository is stored or accessed
- Description — additional context about the repository contents
From this tab you can add tasks for individual searches within each repository and track document counts as you collect records.
Tasks Tab
If the assignment is broken into individual tasks, this tab lets you manage them. For each task you can:
- View the task description and due date
- Update the status: Not Started, In Progress, or Completed
- Upload documents related to that task
You can also create new tasks and assign them to Contributors who will carry out the search work on your behalf.
Documents Tab
Upload collected files here using one of two methods:
- Drag and drop one or more files directly into the drop zone — multiple files are uploaded sequentially with a combined progress indicator (up to 100 MB per file)
- Click Add from Microsoft 365 to browse and search SharePoint, OneDrive, and Outlook for relevant documents. When you add emails with file attachments, each attachment is automatically extracted and added as a separate document alongside the .eml file.
Once uploaded, classify each document as:
- Responsive — relevant to the request
- Not Responsive — reviewed but not relevant
- Duplicate — a copy of another document already collected
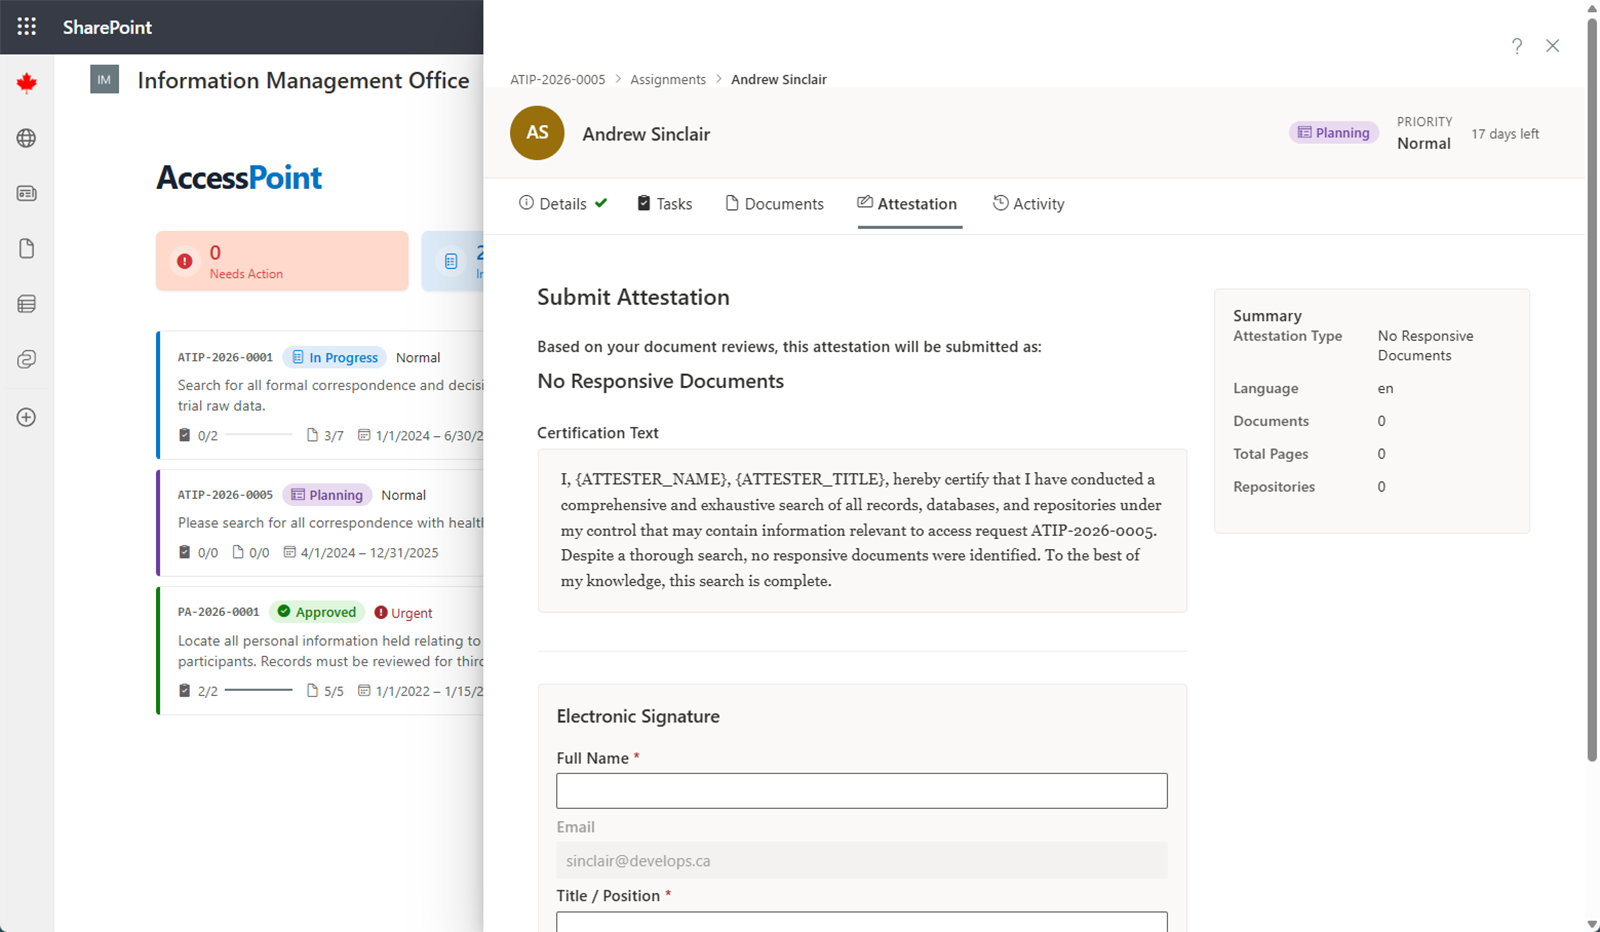
Attestation Tab
When you have finished collecting documents, you must submit a formal attestation confirming that you:
- Searched all specified repositories
- Submitted all relevant documents found
- Reported your results accurately
Review the attestation text carefully, sign it, and submit. The SAO reviews your attestation as part of their approval process.
History Tab
The History tab provides a complete log of all actions taken on this assignment, including status changes, document uploads, task updates, and attestation submissions.
Submitting Your Assignment
When you are ready to submit:
- Review your collected documents to confirm everything is included
- Go to the Attestation tab
- Read the attestation text
- Sign and submit
Your assignment status changes to Submitted. The SAO will then review your work and either approve it or request changes. If changes are requested, you will receive notes explaining what needs to be revised.